Showing posts with label makeover. Show all posts

Wednesday, January 14, 2015

a winter's tale

Sometimes, the whole drying my hair, and then straightening it, and then putting shit in it to keep it from frizzing routine is too time consuming/ I don't feel like it. Especially, if I'm working with day-two hair and wearing it down isn't an option because it may or may not look a little greasy, it's good to have some back up hair ideas on stand by.

Enter: the pony tail.

Effortless. Easy, yet you still give off the impression that you tried a little bit more than simply throwing on your favorite baseball hat and calling it a day. 

And the beauty of the pony tail is that it can be styled in so many ways, and look like a completely different hairstyle each way. It doesn't have to be the same-old, slicked-back, the-higher-the-pony-the-closer-to-heaven pony tail. 

Here are some of my favorite styles. Some I already do really well attempt, but I plan on trying the other styles as well!  Are there any pony tail tricks you've got up your sleeve? Do share!

The Bow
This pony tail look is super feminine and sweet. Add a little flair to
a simple pulled back pony and wa-la! It's an easy way to dress up a casual hair-do.


Inside Out Ponytail
This was a staple hairstyle for me growing up, and I have to say,
I think it's making a come back. This is as easy as it is pretty, and I love
how casual chic it is.


The Messy Mid-Head Pony
What I love about this look is that even though it's slightly unkempt,
it can be worn for both informal and formal occasions. Basically,
this is a looser version on the classic pony tail. Let your hair
be a bit bumpy and wispies be free!


My go-to pony tail style is this one. It's so easy to do, and what's ideal is that
it's meant to be a little messy! This style doesn't have to be perfect which is
exactly why it's a good option for a quick hair fix!

The Braided Head Ponytail
Incorporating braids into your ponytail is right on trend. It looks more like
a cool up-do than a regular pony tail. I also love how this model wrapped
a braid around the pony tail holder.


The Twisted Section Pony
This take on the pony tail adds an element of surprise that is both elegant
and feminine. I love how simply twisting and fragmenting off the pony tail 
creates a totally different look.


The Low Fishtail Pony
This look is one of my favorites! Fishtail braids have such a cool
look to them. Paired with a low pony tail, this style is perfect for casual,
daytime looks, or a night out with the girls.


Here's my version of the low fishtail pony. I pulled back my
side bangs with a couple bobby pins, then fishtail braided
the rest of my hair.

So, what do you think? Would you try any of these styles?

Photo credits:

Thursday, March 20, 2014

Capitol Culture Couture

My friend Ryan turned 30 this month, and to celebrate, he threw a Capitol Culture-themed bar crawl celebration.

When I first got the FB invite, I had no idea what Capitol Culture was-- I had never heard of it. The invitation suggested we google "Effie Trinket" for inspiration. Following Ryan's advice, I promptly flipped open the macbook and got to Googling. It didn't take long to realize this was a Hunger Games theme. I've not seen any of the movies or read any of the books, which explains why nothing on the invitation made any sense to me.

However, whether you've seen the movies or not, the theme was crystal clear.

What I learned was that Capitol Culture is all about luxe. Being overly frosted, sparkled, and made up. More is more. To me, it seems like a satirical view on society and our country's obsession with material things and outer appearances. Either way... I was into the theme because the brighter the colors and wilder the make up = the better the pictures.

Here are some of the photos I used as inspiration for my outfit and hair/makeup:


One thing was certain: I needed drama. Drama on my eyes. Drama in my hair. Drama everywhere.

Another thing was also certain: if I went too dramatic with the whole get up, I could run the risk of looking like a Baltimore City street walker, so I needed to subtle-it-down a little.

My friend Kelly manages a hair salon and was able to help me accomplish the hair and makeup looks I had in mind. (Thank you Kelly, again, for your help!) Here's what we came up with:

This was about halfway done the makeup application. Lashes applied,
bright lip, green shadow, and the start of the gemstones being glued to my face.

My hair was everything. Several french braids and fishtails pulled to the left,
tied together, and crimped. Then all of it was teased. The bottom was dyed pink and silver .

I used a pin (for clothes) as a bright hair accessory to match the pink hair dye.
Because my hair and makeup were... aggressive (albeit pretty, IMO)...
I went with a bright, but simple, dress choice.

In the elevator on the way to the party-- excited to see everyone's looks!

With my friend Mallory and the birthday boy.

Close up of final make up, and Mallory's fierce eye shadow.

The group.

B&W version of the makeup photo. I just thought it looked cool without color.

If you were going to this theme party, what would you do?! Any good ideas for next time?

Until then,
GJU


Friday, October 4, 2013

pucker up

Like Lil' Mama says, my lipgloss is poppin'. #preach

On a related note, I'm an avid fan of Mac Cosmetics, especially their lipgloss and shadows. Even more, I'm a fan of their recycle program. I've mentioned this before on GJU, but here's a friendly reminder: When you bring in 6 empty Mac cosmetics cartridges (they can be anything- old lip glosses, eye shadows, blushes, whatever) they will gift you a free lipstick, lipgloss or eye shadow in return.

I'm a lipgloss girl. I like feeling shiny and, I don't know... supple. Therefore, I usually go for a lipgloss trade-in.

Today, however, I wanted to try something new. I went the lipstick route. I love how chic a red lip looks, but I have never felt that I could pull it off. After trying on a bunch of different shades to see which complemented my skin tone, I narrowed it down to one neutral tone, a peach tone, and a bright pink.

The girl at the counter convinced me to get the bright pink since it was most outside of my comfort zone. She made a good point that 1) it was a color I'd not usually pick for myself and 2) why not go with an adventurous color since I was getting it for free? Valid.

The color I chose was "Saint Germain."


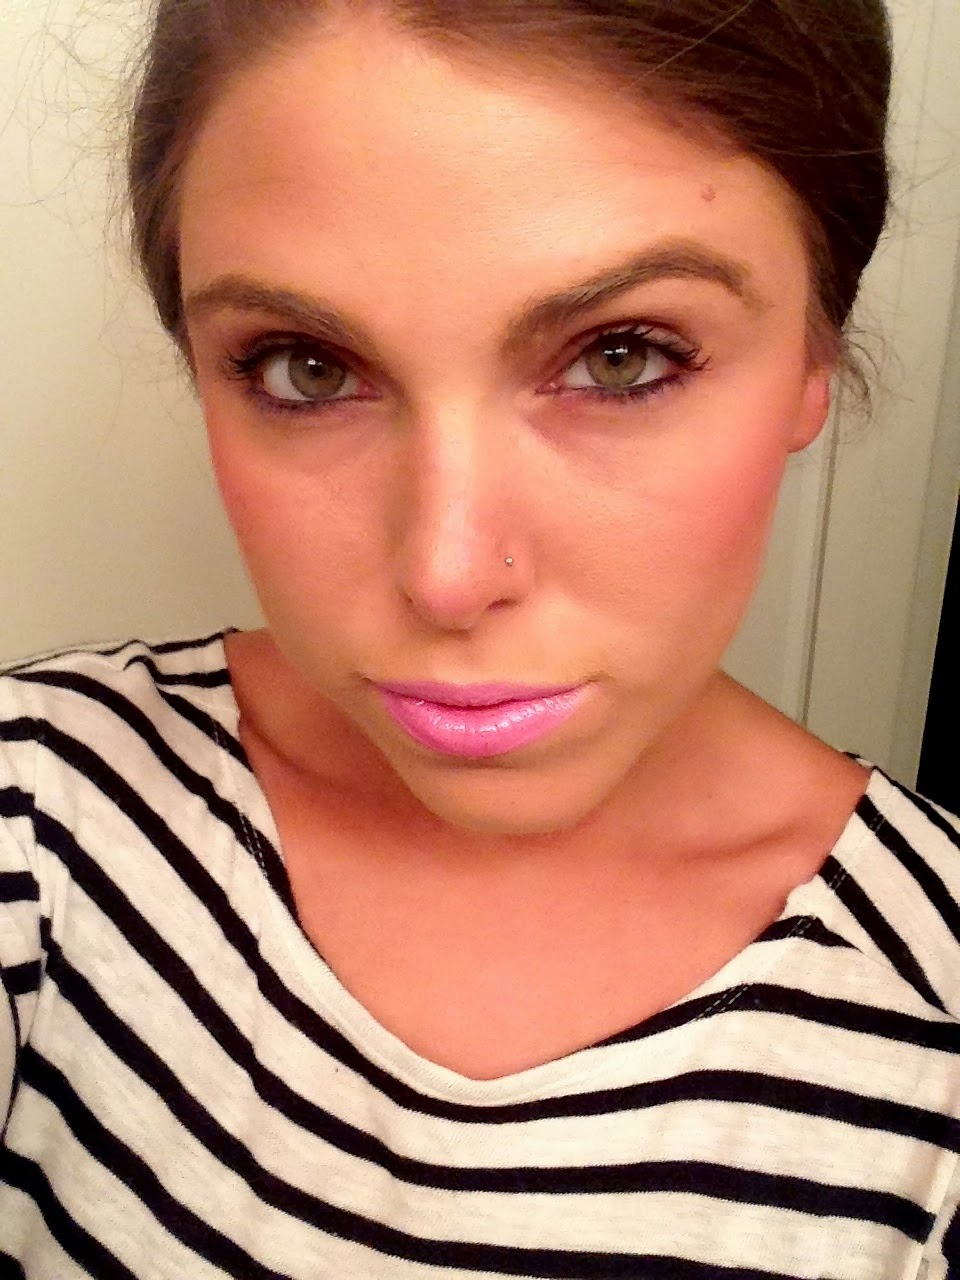
And here it is, on...


It's a little "pinker" than I'd usually go for, but at the same time, I think it has a young, fresh look.

Do you prefer lip gloss or lipstick? Any good color suggestions? Shoot 'em my way :)


Tuesday, September 24, 2013

The Bold and the Beautiful: Brows

I'm a firm believer that eyebrows matter.

Sometimes I see people who have over-waxed or gotten a little too happy with the tweezers... and honestly, they run the risk of crossing the fine line over into trashy-town. Thankfully, it looks like the trend is moving away from barely there brows.. and I think it's for the better.

Gwen Stefani

See what I'm saying?

The good news is that full brows are "in" for fall. They're sultry. They tell a story. They draw people in and bring attention straight to your eyes. Think of Brooke Shields a la her Calvin Klein days. Sex. Pot.

Brooke Shields


We're seeing this bigger, bolder brow on our favorite celebs as well:

Diane Kruger

Camilla Belle

Chloe Moretz

Keira Knightley


Sofia Vergara

This goes for men as well:

Mr. Beckham, himself

R. Patz

I've always been on the bolder brow bandwagon. I have a thick head of hair, so for me, I didn't really have a choice but to the go with the fuller brow flow:


How do you do your brows? Do you like to keep them a little fuller in the fall? 

(p.s. This article in Elle gives some fabulous tips on shaping your brows to achieve the perfect arch!)

Until next time,
GJU

Photos: Glamour

Thursday, May 10, 2012

Get the Look: Lea Michele in Avon


You guys know I'm a huge fan of Avon-- and I'm also shamelessly in love with Glee. Today's post combines both of those loves. I'll show you how you can achieve celebrity Lea Michele's make up at with the same Avon products used to create her flawless look.


Celebrity Makeup Artist Melanie Inglessis was behind Lea Michele's beauty application at the recent Met Ball. Melanie put the focus on Lea’s eyes by lining them with a deep plum liner and then layered copper toned eye shadows on the actress’s lids. 

Using a soft crease brush, she blended the edges of the liner with the shadow to create definition and give that smokey eye effect. Melanie then upped the drama (which you know I love) by swiping a dark eye shadow over the liner and adding two coats of black mascara. 


To offset the intensity of the eyes, Melanie kept the rest of Lea’s face simple: she added a rosy flush of color on her cheekbones and opted for a natural lip, using a pale lipstick to enhance Lea’s own lip color.


Make it Your Own to Get the Look:

EYES:
Avon Eye Brightening Pencil in Honey Blue ($7-- currently on sale for $3.99!)
Avon Eye Brightening Pencil in Plum Berry ($7)
Avon ExtraLasting Mascara in Extreme Black ($9.50-- currently on sale for $4.99!)
Chanel Ombré Essentielle in Mahogany 51 ($28.50)
Illamasqua Liquid Metal in Enrapture ($26)

FACE:

Avon Be Blushed in Icy Petal ($8)
Kevyn Aucoin 'The Sculpting' Powder in Medium ($42)


LIPS:
Shiseido Perfect Rouge Lipstick in Spiced Cream ($25)

Wednesday, March 7, 2012

Natural Beauty Routine

I get a lot of questions about my daily makeup routine, so today I'm going to share with you some of my new favorite daily products by Mark from Avon.

If you read my blog, you can probably tell the makeup I use is very minimal. I'll do a pop of color on the lip, but in terms of complexion and eye shadow, I tend to stay in the neutral, more natural shades and tones.  What I love about these Mark products is that they don't over power my natural look-- they simply enhance. In fact, that's how I feel makeup should always be-- it should enhance, not alter the way you look.


Tinted makeup" Almay "Smart Shade" liquid makeup in Light/Medium, $13.49
Eye Shadow: c/o Mark "On the Dot" neutral eye color compact, $16
Mascara: c/o Mark "Lash All You Want" mascara, $10
Lips: c/o Mark "Gloss Gorgeous" lip stain in Pop Splendide, $11

In this picture, all I have on is a tinted moisturizer as a base. Using a moisturizer before applying makeup does a few things: prevents dryness, helps create a unified base color for the makeup, provides a layer of SPF protection (depending on the brand you use), and helps seal the makeup so it lasts longer throughout the day. I wanted to show you guys a complete before and after shot.


I first apply a light golden shade of eye shadow on the entire lid. Then, to add some contrast, I take a slightly darker shade and place it on the outer corners of my lid.

The lighter shade I used it the bottom row, far right.
The darker shade is the bottom row, middle.


Next, I take mascara an apply both on the top and bottom of the lash. This allows the lash to really stand out. In the photo below, you can see that just one coat of the Mark "Lash All You Want" mascara on the right eye made a huge difference!


Mascara on both lashes...


Finally, apply a bright shade of lip stain to finish the look. I prefer lip stains and lip glosses to lipsticks because they tend to last longer throughout the day. 


Before & After:


What I love about this morning make up routine is that it takes little to no time, and very little effort. Between getting ready for work, setting aside time for breakfast, and taking care of my dog, I have limited extra time in the morning to put on makeup. These products speak for themselves and make it so easy and quick to apply and get started with your day. 

I believe that with make up, especially during the day, less is more! Hopefully this post shows you that it doesn't take much (only three products!) to spruce up your look and enhance your natural beauty.

Tank: American Apparel, Rib U-Neck Tank, $22
Necklace: c/o Mark "Decked Out Necklace" , $28

So, what's your daily makeup routine?

<3
GJU


Tuesday, February 14, 2012

Tutorial Part II: Sassy Kitten Nails!

It seems that people really loved reading Caitlin's make up tutorial, so here's round two of her post! Pair your smokin' hot cat eye with a fierce, easy-to-do nail design!

Back to Caitlin's post...
---
Now, for a quick three-step cheetah print nail to go with your smoky cat eye look. Here are the polishes I used: 


Apply two layers of a base color of your choice – I chose gold and red as an homage to the upcoming Valentine’s Day holiday: 


Using a black nail art color, draw semi-circle shapes on each nail:


Using a white nail art color, dab little circles inside each semi-circle shape and finish 
off with a clear topcoat:


Tip: to clean up excess polish on your cuticles, you can dip a small precision brush dipped in nail polish remover.

I hope these tips were helpful and that you feel inspired to go experiment with some color! 
---

Well... I hope this inspires you, like Caitlin said, to experiment with bright colors and patterns on your nails. And.. in honor of Valentine's Day, may your inner cheetah come out and have a good night with your man! (Or woman!) To each her own :)

Happy Valentine's Day!